How to Add a Zipper to a Hoodie? That’s an easy question with Yes That Hoodie because we have so many years exp in this kind of shirt! You can start by laying it flat and smoothing out the wrinkles. Measure and mark the center line for the zipper with fabric chalk. Choose a zipper that complements the fabric—metal for a rugged look, plastic for a lightweight feel—and verify its length matches the hoodie. Cut along the marked line, then align and pin the zipper, keeping teeth visible. Use a zipper foot on your sewing machine for precision, stitching closely along the teeth, and backstitch to secure. Add finishing touches for a polished appearance. Explore advanced techniques to elevate your style further.
Key Takeaways
- Select a compatible zipper material and style for your hoodie’s fabric type and desired look.
- Prepare and mark the hoodie accurately for zipper placement using fabric chalk or a removable marker.
- Carefully cut along marked lines, using appropriate tools based on the fabric type.
- Pin the zipper securely in place, ensuring alignment and symmetry before sewing.
- Sew the zipper with a zipper foot, using a straight stitch close to the teeth for a polished finish.
1. Gather Your Materials
Before you plunge into the creative process of adding a zipper to your hoodie, make sure you’re equipped with the right materials. Start by selecting a zipper that complements your hoodie’s fabric type. Is your hoodie made of cozy fleece, stretchy knit, or lightweight cotton? Each fabric type demands a different kind of zipper. For thicker materials like fleece, consider using a robust metal zipper. For lighter or stretchier fabrics, a plastic or nylon coil zipper might be more suitable, offering flexibility and ease.
Next, explore the world of zipper styles. Are you drawn to the edgy appeal of an exposed zipper, or do you prefer the sleek look of a hidden zipper? Decide if you want a zipper that stands out with bold metallic hues or one that seamlessly blends with your hoodie’s color. The length of the zipper should match your hoodie’s opening, so measure accurately to avoid any fit mishaps.
Finally, don’t forget essential tools like scissors, pins, and a sewing machine equipped with a zipper foot. With these materials in hand, you’re ready to begin your hoodie transformation journey.
2. Prepare Your Hoodie
Transform your hoodie into a chic, zippered masterpiece by starting with a clean slate—lay it flat and smooth out any wrinkles. Grab your trusty fabric chalk or removable marker to sketch out the perfect zipper path, ensuring it aligns with your style vision. Keep your toolkit close, with essentials like scissors and pins ready to turn your creative ideas into reality.
2.1. Gather Necessary Tools
Immerse yourself in the creative process of adding a zipper to your hoodie by first gathering all the essential tools you’ll need. This step is vital in guaranteeing a smooth, stylish transformation. Let’s plunge into the world of sewing techniques and zipper types.
Start by selecting the right zipper for your hoodie. There are various zipper types out there, such as metal, plastic, and invisible zippers. Choose the one that complements the fabric and desired style. For a trendy look, consider a bold, contrasting color. Don’t forget about sewing techniques—these will be your guide to achieving a professional finish.
Here’s a handy table to keep you organized:
|
Tool |
Purpose |
|
Zipper |
Fastening and styling |
|
Sewing machine |
Precision stitching |
|
Fabric scissors |
Clean cutting edges |
|
Pins and needles |
Securing and hand-stitching |
Having these tools at your disposal will set you up for success. Remember, the sewing machine guarantees precision, while pins and needles allow for meticulous hand-stitching. Embrace the trend-aware approach by carefully selecting each component to fit your urban aesthetic. As you gather these tools, you’re setting the stage for a chic, personalized hoodie that stands out.
2.2. Mark Zipper Placement
Precision is key as you commence marking the zipper placement for your hoodie. Begin by laying your hoodie flat on a clean, well-lit surface. Make sure the fabric is smooth, free from wrinkles, and aligned symmetrically. With the latest zipper alignment techniques, finding the centerline is vital. Fold your hoodie in half vertically, matching up the side seams and shoulder points. Use tailor’s chalk or a fabric marker to draw a light line, indicating where your zipper will sit. This step guarantees your zipper is flawlessly centered and stylishly sleek.
Next, measure the length of your zipper. With a measuring tape, note the distance from the neckline to the hem. Transfer this measurement onto the centerline, marking the top and bottom zipper stops. Remember, symmetry is your ally. Double-check your marks using fabric marking methods to confirm precision. It’s trendy to use contrasting color chalk for better visibility, but make sure it won’t stain your fabric.
Finally, revisit each mark with a critical eye, assuring accuracy and alignment. This meticulous approach will set the foundation for a perfectly installed zipper, blending functionality with a modern, polished look.

3. Choose the Right Zipper For Your Hoodie
When choosing the right zipper for your hoodie, start by measuring its length to guarantee a perfect fit. Pay attention to the zipper’s material to make certain it complements your hoodie’s fabric—think brass for a rugged look or plastic for a lightweight vibe. Stay on trend by mixing textures and colors that elevate your hoodie from ordinary to extraordinary.
3.1. Zipper Length Considerations
Choosing the right zipper length is often vital when adding a zipper to a hoodie, as it directly influences the garment’s fit and functionality. Start by considering the hoodie’s style and how far you want the zipper to extend. A full-length zipper adds versatility, allowing you to wear the hoodie open or closed, while a half-length or quarter-length zipper offers a trendier, more casual vibe. Zipper types play an important role too. Opt for a separating zipper if you want the hoodie to open fully. For shorter zippers, a closed-end type could work just fine.
To determine the perfect zipper length, measure from the neckline to the bottom hem if you’re going for full-length. For partial zippers, decide where you want it to end and measure accordingly. Always err on the side of caution—select a zipper slightly longer rather than shorter, as you can always trim excess. Zipper lengths are typically standardized, so check your local craft store or online suppliers for a variety of options. Remember, the right zipper not only enhances the hoodie’s function but also aligns with current fashion trends, ensuring your DIY project stands out.
3.2. Material Compatibility Check
As you zero in on the perfect zipper length for your hoodie, it’s time to contemplate how it’ll interact with the fabric. The harmony between fabric types and zipper materials can make or break your project. Start by evaluating your hoodie’s fabric: is it a cozy cotton blend, a rugged fleece, or perhaps a sleek polyester? Each fabric type demands a zipper that complements its texture and weight.
For lightweight fabrics like cotton or jersey, opt for a finer, coil zipper—it’s flexible and won’t weigh down the material. If your hoodie is made of heavier fabrics like fleece or wool, consider a robust metal or molded plastic zipper. These options are durable and provide the necessary support for thicker materials.
Don’t overlook color and finish. A trendy contrast zipper can make a bold statement, while a matching hue can give a seamless look. Also, consider the environment: plastic zippers resist moisture, making them ideal for activewear. Metal zippers, on the other hand, offer a classic, timeless appeal.
Ultimately, choosing the right zipper involves balancing aesthetics and functionality. Keep an eye on the latest trends, and your hoodie will not only look great but function perfectly.

4. Mark the Zipper Placement
The humble measuring tape is your best friend as you commence marking the zipper placement on your hoodie. Start by laying your hoodie flat on a clean surface. You want precision here—this step sets the stage for a sleek, professional finish. Follow these zipper alignment tips: measure evenly from the center of the neckline down to the hem. This guarantees your zipper runs straight as an arrow.
Next, employ fabric marking techniques to outline your path. A tailor’s chalk or a disappearing ink pen works wonders. These tools help you create a visible yet temporary guide, avoiding any permanent marks on your favorite hoodie. Remember, fashion is about precision.
Here’s a handy table to visualize your layout:
|
Step |
Tool |
Purpose |
|
Measure Length |
Measuring Tape |
Guarantee even placement |
|
Mark Center Line |
Tailor’s Chalk |
Create a guide for cutting |
|
Mark Zipper Ends |
Disappearing Ink Pen |
Define start and stop points |
|
Double Check |
Ruler |
Confirm straight alignment |
|
Final Adjustments |
Eraser (if needed) |
Refine your lines |
With these steps, you’ll master the art of marking, setting the foundation for a perfectly aligned zipper.

5. Cut the Hoodie Fabric
Now that you’ve meticulously marked the hoodie, it’s time to cut with confidence. Begin by choosing the right cutting technique for your fabric type. If you’re working with a classic cotton blend, a sharp pair of fabric scissors will glide smoothly, giving you clean, precise lines. For stretchier materials like fleece or jersey, consider using a rotary cutter; it helps maintain the fabric’s natural elasticity without distorting the edges.
Lay your hoodie flat on a cutting mat to guarantee accuracy and protect your workspace. Carefully follow the line you marked, keeping your hand steady and your grip firm. Remember, consistency is key to achieving that professional finish. If you’re cutting through a thicker material, you might need to apply a bit more pressure.
Be mindful of the fabric’s grain, which affects how the hoodie hangs and fits after the cut. Cutting against the grain can lead to unwanted twists and pulls. With each snip, you’re transforming a simple pullover into a trendy zip-up, so take a moment to appreciate the process. This careful attention to detail guarantees your finished hoodie not only looks stylish but also stands the test of time.

6. Pin the Zipper in Place
Slide your zipper into position with confidence, ready to transform your hoodie into a fashion-forward piece. Begin by laying the hoodie flat, guaranteeing both sides are smooth and wrinkle-free. This is the perfect moment to embrace innovative pinning techniques that will keep your zipper alignment flawless. Start at the bottom edge of the hoodie, aligning the zipper teeth with the fabric edge. This guarantees the zipper opens and closes seamlessly.
Use straight pins to secure the zipper in place, inserting them perpendicular to the zipper tape. This will hold it steady while you work, preventing any unwanted shifting. Place pins roughly an inch apart, guaranteeing the teeth remain visible above the fabric edge. Pay close attention to the zipper alignment, verifying it lines up symmetrically on both sides of the hoodie. The zipper pull should glide effortlessly without any fabric interference.
As you pin, periodically close the zipper to check for symmetry and smoothness. Adjust as necessary to maintain a chic, professional look. This meticulous process sets the foundation for a stylish and functional addition. Remember, precision in pinning guarantees your hoodie stands out with its sleek new zipper.

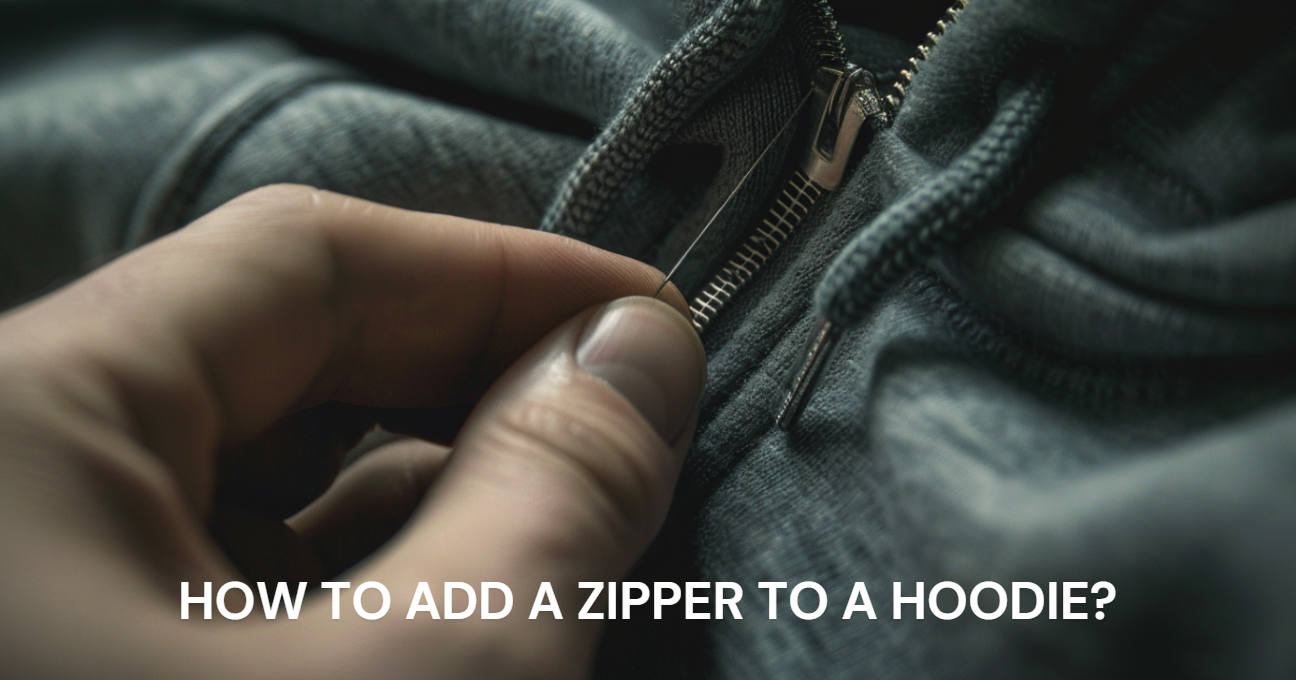
7. Sew the Zipper
Master the art of sewing by confidently stitching your zipper into place, turning your hoodie into a masterpiece of modern style. Embrace innovative sewing techniques as you tackle this task. Begin by selecting the right zipper type for your hoodie—whether it’s metal for a bold statement or nylon for a subtler touch. Once chosen, make sure your sewing machine is fitted with a zipper foot, an essential tool for precision.
Follow these steps to achieve a flawless finish:
- Align and Pin: Double-check the alignment of the zipper with the hoodie edges. Pin it securely to avoid any shifting during sewing.
- Start Sewing: Begin at the top of the zipper. Use a straight stitch, making certain you sew close to the zipper teeth for a sleek look.
- Check for Consistency: As you sew, check for uniform stitch length and tension. Adjust as needed to maintain a professional appearance.
- Secure the Ends: Finish by backstitching at the zipper’s bottom and top, making sure it’s firmly attached.

9. Finishing Touches
Often, the final touches on your hoodie can elevate it from a simple project to a fashion-forward piece. After sewing in the zipper, it’s time for those essential final adjustments and aesthetic enhancements. Start by ensuring the zipper aligns perfectly with the fabric. If necessary, trim away any excess threads for a clean, polished look. Consider adding a zipper pull for a customized touch, which not only enhances usability but also adds flair.
Enhance your hoodie’s appeal by playing with embellishments. You might want to add patches, embroidery, or even fabric paint. Choose elements that speak to your personal style — think edgy, minimalist, or bohemian.
Here’s a quick guide to some finishing options:
|
Feature |
Purpose |
Trend Alert |
|
Zipper Pulls |
Ease of use |
Choose metal or leather |
|
Decorative Stitching |
Adds texture |
Contrast colors are in |
|
Custom Patches |
Personalization |
Vintage logos are trending |
|
Embroidery |
Artistic enhancement |
Geometric designs are popular |
Finally, run a quick iron over the seams to set everything in place. A hoodie with a well-finished zipper not only stands the test of time but also becomes a staple in your wardrobe, showcasing your creative flair.
Frequently Asked Questions
1. Can I Use a Zipper With Plastic Teeth for My Hoodie?
Yes, You can use a zipper with plastic teeth. Plastic zipper advantages include being lightweight and rust-resistant. For smooth installation, measure precisely, pin securely, and sew with a zipper foot for accuracy. Embrace this trendy, functional addition!
2. What Type of Thread Is Best for Sewing a Zipper Onto a Hoodie?
You’re choosing the best thread types for style and durability. Opt for polyester or nylon thread. Use tight sewing techniques to guarantee a strong hold. Stay trend-aware by matching thread colors with your hoodie’s design.
3. How Do I Prevent the Zipper From Puckering the Fabric?
Imagine the smooth glide of a zipper. Maintain fabric tension by pinning evenly, like a calm sea against a sturdy dock. Guarantee perfect zipper placement by aligning it with precision, keeping the fabric’s surface flat and even.
4. Is It Possible to Add a Zipper to a Hoodie With a Kangaroo Pocket?
Yes, you can add a zipper to a hoodie with a kangaroo pocket. Just measure the zipper length carefully, ensuring it doesn’t interfere with the pocket placement. Consider trending zipper styles for a modern twist that complements your design.
5. How Can I Ensure the Zipper Aligns Perfectly With the Hoodie Seams?
Think of aligning a zipper like a dance, where each step counts. Use seam alignment techniques and zipper placement tips to guarantee precision. Lay your hoodie flat, pin the zipper carefully, and adjust until everything aligns beautifully.
Conclusion
Congratulations, now you know How to Add a Zipper to a Hoodie with ease, right? With your newfound skills, you’re not just following the crowd; you’re setting the pace. Remember, the devil’s in the details, so each stitch and alignment mattered. Now, sport your customized hoodie with pride, knowing you’ve added a touch of flair. Keep pushing the envelope with your DIY projects—you’ve got the knack for turning ordinary into extraordinary!